Showing posts with label holidays. Show all posts

Tuesday, February 19, 2013

heart pillow.

hello lovely! my name is rae and i own a company with my mom called ARMOMMY. i have 4 kidlets and created armommy to give every mama access to helpful products and fresh designs, as well as fantastic recipes, DIY's and DIWY's (do it with youngsters) via our blog. hope you stop by!heart-pillow-armommy-a-little-artsy (picture by stacy jacobsen of my no. 3, tilly!) 

teaching kids to use a needle and thread opens up a whole new world of creativity. plus it's fun, inexpensive and a great boredom buster! if you haven't done a ton of sewing together, making a pillow is a great place to start. using different fabrics and cutting various shapes makes them easy to customize to their personalities, living spaces or even as a gift! heart-pillow-3 last week i spent sometime with my neice, ellie (5 yrs.) making a heart pillow. here's the supplies we used: fabric (we have some fun options on etsy), fabric scissors, needle and thread, colored pencil, thimble, pillow stuffing, a few pins. heart-pillow-2   1. cutout your shape from two pieces of fabric and place right sides (patterned sides) together. pin in place. 2. using the colored pencil, draw a line for your child to use as a guide as they stitch. thread the needle (i doubled the thread and tied the end so ellie couldn't pull it through) and get them started! heart-pillow-4   3. hand over the needle and have them sew all the way around using a running stitch, leaving a 2 inch opening. 4. fill with stuffing. heart-pillow-5 5. once stuffed, tuck in the raw edges and close using a whip stitch. heart-pillow-1now it's ready to use, cuddle, display or gift! wasn't that fun!? hope you enjoyed. if you know of any fun sewing project ideas for kids, please share in the comments below! it's been r e a l . can't wait to see you again on a l i t t l e a r t s y or armommy! xo . rae   r a e {vp & mom} ARMOMMY

Thursday, February 14, 2013

fingerprint love.

Annapolis & Company | Simple DIY Valentines
Valentines Day hit me yesterday. Like hard. And now we are in the thick of love mode around here. I wanted to create some simple valentines with the schooners without spending any money and using what I had on hand. It's no secret I love neutrals and black and white...so we came up with these sweet valentines and dare I say? I love them.
Annapolis & Company | Simple DIY Valentines
All you need are some willing thumbs, a black ink pad, paper, and some letter stamps.
Annapolis & Company | Simple DIY Valentines
Sweet thumbprints and childlike handwriting {mum helped her}...does it get any more valentinesy??? We gave these to some loved ones along with these raspberry muffins...just perfectly fitting for the holiday.
Annapolis & Company | Simple DIY Valentines
Happy Valentines Day to you all.
Love,
us and the schooners
Annapolis & Company | Simple DIY Valentines

Wednesday, February 13, 2013

Valentine love.

Hi, I'm Courtney ~ a Military WifeArt Teacher, and Momma to a sweet blue~eyed little boy who's generous with his kisses and loves Mickey Mouse.  I share everyday art projects and creativity for children and families, along with my stories of love, faith, and motherhood on Once Upon a Canvas.  I dream of fresh boxes of Prismacolors, textured paper, and of one day having my own art studio where I can teach art to little ones on paint~stained tables all day long.


This projects teaches:
Mixing Colors 
Beginner's Watercolor Painting
Crayon Resist Watercolor Technique 

This project encourages:
Exploration & Learning Through Play
Development of Fine Motor Skills 
 
Recommended for ages 12+ months.
 

Crayon Resist is the perfect introduction to watercolor for little ones.

It's a simple, laid~back kind of painting activity that will encourage your young artist to play while they learn to manipulate color with water ~ without the added pressure of having to "stay in the lines".

When applied to paper before painting, waxy white crayons resist watercolor, leaving behind a fun element of surprise and magic for your little one to reveal with their paintbrush.

What You'll Need:
+ Watercolor Paper (not 100% necessary, but textured paper works best for this project)
+ A Ruler
+ A Pencil
+ White Crayons
+ Watercolors
+ Paintbrushes
+ A Cup of Water 

What You'll Do:
+ Help your child divide their paper into four equal quadrants with the ruler and pencil.
+ In each quadrant, encourage them to get creative, and guide them to draw their own cover designs for their cards in white crayon (if they're still a bit too young to do this part on their own, you may do the first two steps for them ahead of time).
+ Show them how to wet their paintbrush, dip it in their favorite colors, and brush the paint onto the paper, revealing their white crayon drawings ~ just like magic!
+ Repeat this ^ step over and over, again, until their Valentine Cards are ready to go.
+ First hang the paper to dry, then carefully cut the cards apart with a pair of scissors.
+ Seal them in an envelope (with a kiss, of course ;-)), and send them off to your sweethearts!

My almost~two year old ^ had a blast painting his own set of cards.

It seemed to be an interesting enough activity to hold his attention, and quick enough that he was able to complete the project in one sitting (which, to be honest, is pretty rare :-)).

Even the littlest kiddos who are just old enough to dip their brush in paint are able to do this project with an adult's guidance, which is why it's a perfect technique for your children to try out to create beautiful, unique and memorable handmade Valentine Cards that your loved ones will be sure to cherish.

Go ahead.  Impress The Grandparents ;-) 

Sunday, February 10, 2013

Valentine.

Contributed by Danielle Roy. Christ follower.  Married to my best friend. Mother to three. Photographer. Vintage. HomeschoolLikes simple.  Enjoys the little things.  From the SouthBlogs at PONY+MAUDE. Instagram @PONYMAUDE.

This ranks right up top with me, as far as Valentines go. And it's one you will for sure want to pull out year after year.  I pinned it here 

Recently, I have utilized this pretty cool website for making coloring pages straight from pictures we have taken. So when I saw this Valentines idea, I knew exactly how to get the same look- without having to be a sketch artist! The project is self explanatory and took all of 5 minutes.  The kids cut the hearts, I cut  the sketches. I'll say it again, my heart is all a pitter patter over this one.

Saturday, February 9, 2013

heart nail art.

Hi guys, I'm Kelly. Lover of all things tactile, obsessive nail biter and believer that there can never be too many ruffles. Also, Mama to buddy roo + two, designer, creative director & blogger at Westover Manor. Where I share my style, show off my little ones and talk a bit about life and design.

HEART NAIL ART DIY | westover manor


It's the home stretch to Valentine's Day, so I figured we should wrap it up with a little nail art. I am way into nail polish at the moment... mostly because it's the only thing keeping me from obsessively biting my nails, like usual. I've gone almost a full month without taking my nails down to the numbs, so I am very pleased to be able to show them off to you today!

tools // 
Nail File
Paint brush with a pointy tip
Red & White nail polish
Base coat
Top coat

how to // 
Begin by sculpting your nails with the nail file.
Paint on your base coat, followed by one to two coats of red nail polish. Ensure that the red is very dry so it won't accidentally get into your white nail polish.
Using the paint brush make a V shape with the white nail polish. Go over the V a few times to fill it in, or carefully wiggle the paint brush a bit to give each half of the V a thicker, more heart shaped look. Allow the heart to dry and paint on your top coat.
  STEPS

Happy Valentine's Day!

just love // kelly 

♥  ♥   

PS - Find a few valentine's day themed desktops over here.


Thursday, February 7, 2013

heart headband.

Hey y'all, I'm Ginny! Mama to Addison + Jack, wife, Texas gal and blogger over at Chasing Sunshine. A little lifestyle and creative blog where I share bits  + pieces of my life with fun crafty tutorials along the way.

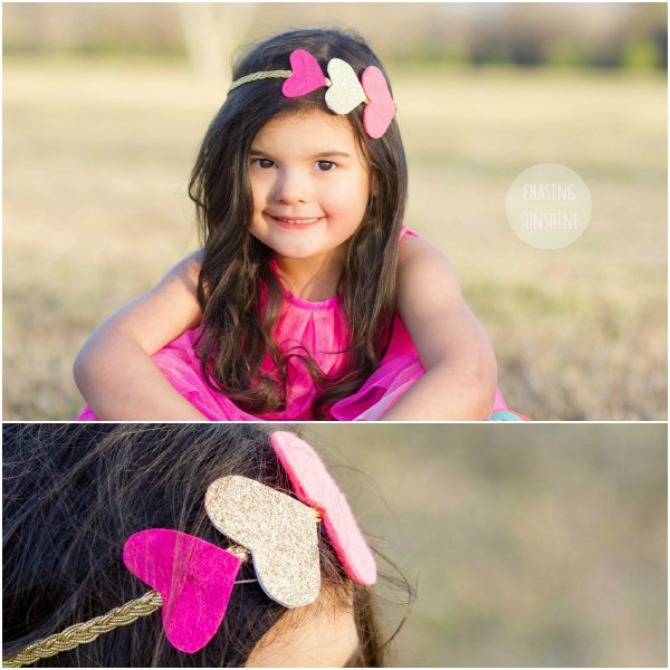
Today's tutorial is EASY and I do mean easy + the end result is awesome...end of story! I just LOVE this for Valentine's day, but of course it is perfect for any time of the year, just switch out the colors and you are good to go. 


What you need: one yard of ribbon, string or elastic of choice, felt for hearts and felt for backing, scissors, glue gun. 

What to do: 1//cut out heart shapes from your felt. You want to cut two pieces for each heart you are attaching to the headband 2//cut circles out for the backing. You will need one circle for each heart 3//hot glue the two pieces of each heart together so it is now one piece (see below)


4//after you have each heart glued together you want to lay them out onto a flat surface 5//place a line of hot glue down the middle of each heart (going vertical) and place your ribbon of choice down on top. Press for a few seconds so that the glue sets 6//now you want to glue down your felt backing onto the top of the ribbon and heart (see below) 


Now, flip your headband over and view the finished result! If this is not easy then I don't know what is. Play around with your design and the placing of the hearts to make a few different headbands. We love ours!

We ended up just tying ours around the head to secure them and it worked perfectly. Feel free to sew the ends together if you think this will work better for you. 


Send me pictures of yours if you make one...I'd love to see them: hello@chasingsunshineblog.com! Oh and have a HAPPY day. xo-ginny

Tuesday, February 5, 2013

love.

CoupleJones wreath
Hi! My name is Emily. My husband, Zac, and I started CoupleJones.com. We are so excited to visit A Little Artsy today! We have been married for almost 10 years and have 3 crazy little girls. We both love design and art - he is a designer and I am a stay at home mom who loves photography, sewing, and random crafts that I get a bee in my bonnet about trying.
We had a little extra time the other morning, she wanted to draw and I thought I should PROBABLY take down and update the Christmas-y looking wreath on our front door...yeah...I know it's February. When did that happen, by the way? See how I'm so on top of things? Heh.
This is my quick and easy update to my twig wreath (from JoAnn's).
All you do is cut a BUNCH of hearts...
Wreathcollage1
Overlap your hearts as you'd like them to be and sew a straight line along the center. Then use a glue gun to glue the heart garland around the circle as you'd like. I overlapped the ends of the garland so it was one continuous looking circle. As I was making this I was thinking I probably will make another heart garland like this and use it just as a garland because it was so cute.
Wreathcollage
Done! Avoid baby's curiosity...
Couplejonesprojects10
And enjoy!!
Wreath6

Tuesday, January 22, 2013

handmade LOVE.

WRITTEN

Hi ya, I'm Kelly. Mom to buddy roo + two, designer, creative director & blogger at Westover Manor. Where I share my style, show off my little ones and talk a bit about life and design.

I almost never decorate for holidays. Christmas is my one exception. It's the only one I feel that needs the extra stuff to really make it feel magical. But this year I'm trying make bigger deals of holidays so the kiddos know they are special and different than other days and times in the year.


Today the Q dude made his heart stamped valentines. We made three in all, one for Grandma & Grandpa, one for Nana & Papa and one for Daddy-o. We ran out of steam at the end and didn't get to string the ribbon through the top of these, but you can imagine how cute that will look.

xoxo

Tools //
Toilet Paper Roll
Tape
Paint
Ribbon
Scissors - for the ribbon 
Construction or Printer paper

HANDMADE_VALENTINES

How To //
1. Start with the toilet paper roll
2. Fold it in half and crease it
3. Open the roll back up and push the center of one side down until it touches the other side
4. Tape the now heart shaped roll so it keeps its shape
5. Make sure you have the shape you want, otherwise re-adjust and re-tape.
6. Lay out your computer/construction paper
7. Pour a thin layer of paint into a bowl
8. Show your little one how to dip the paint
9. And stamp it
10. Set them loose & 
Let 'em go!


HEARTSTAMPQ_STAMP Q_STAMP2 Q_STAMP3 Q_STAMP4PAGE

Extras //
We'll be using a hole punch at the tops of these to add some glitter ribbon.
I'm planning on helping Quinn write his name on these for that little extra touch of love.


xoxo


Monday, January 14, 2013

hip handmade heart streamers.

Header
TWOUP

Hi ya, I'm Kelly. Mom to buddy roo + two, designer, project manager & blogger at Westover Manor. Where I share my style, show off my little ones and talk a bit about life and design.

I almost never decorate for holidays. Christmas is my one exception. It's the only one I feel that needs the extra stuff to really make it feel magical. But this year I'm trying make bigger deals of holidays so the kiddos know they are special, and different than other days and times in the year.

Plus, these make the house feel all nice and cozy and cutesy and we could use a little cozy and cutesy around here. It is a lovely little holiday that silly St. Valentines day.

I used a Plain and Simple magazine for these and truth be told it felt a little sacrilegious tearing one of those little Martha beauties into little heart shaped bits. But I liked the texture of the pages the best out of all the magazines I had in the house. I've seen these made with book pages, but that would really truly feel sacrilegious.

HEART STREAMERS

Tools// 
String 
Scissors 
Magazine Pages 
Hole Punch

steps1 | westover manor

How To//
Tear out a dozen or so magazine pages. 
Fold in half, then half again. 
Trim the uneven edges and cut open the folded edge. 
Fold in half one more time. 
Trim out your heart shape.

steps2 | westover manor

Punch two holes in the center of the heart. 
'Sew' the string through the holes. 
Tie each heart off with loose knots, large enough so the holes won't slip through. 
Hang & enjoy!

VALENTINES DAY | westover manor

Thursday, December 20, 2012

a wrap job

why hello. my name is Dawnelle. i am considered many things, mother and wife are at the top of the list. but you must not forget lover of sharpies, chief nose wiper, avid obsessor of texture and fabric, bohemian lover, interior designer, laundress, and the best book reader ever. i write over on Just Dawnelle about my sweet family and my life... what i think, feel, love, believe, do and obsess over. 
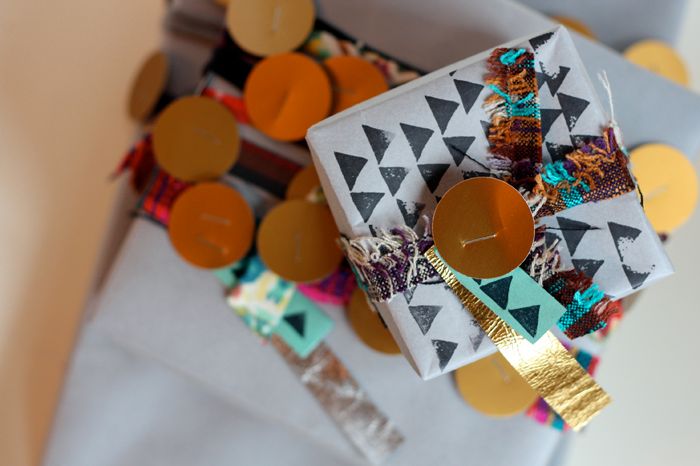
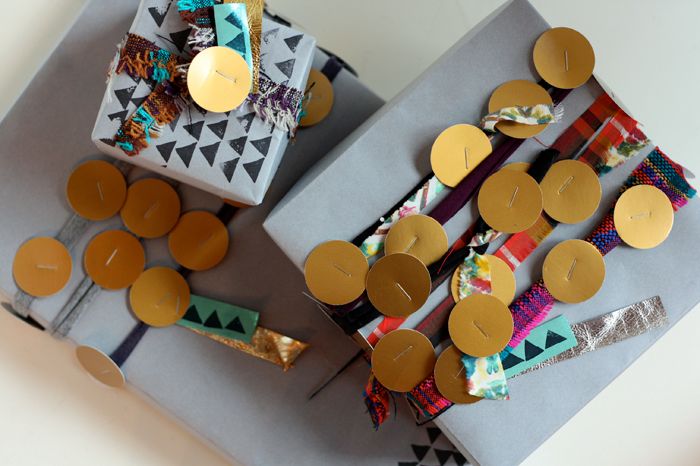
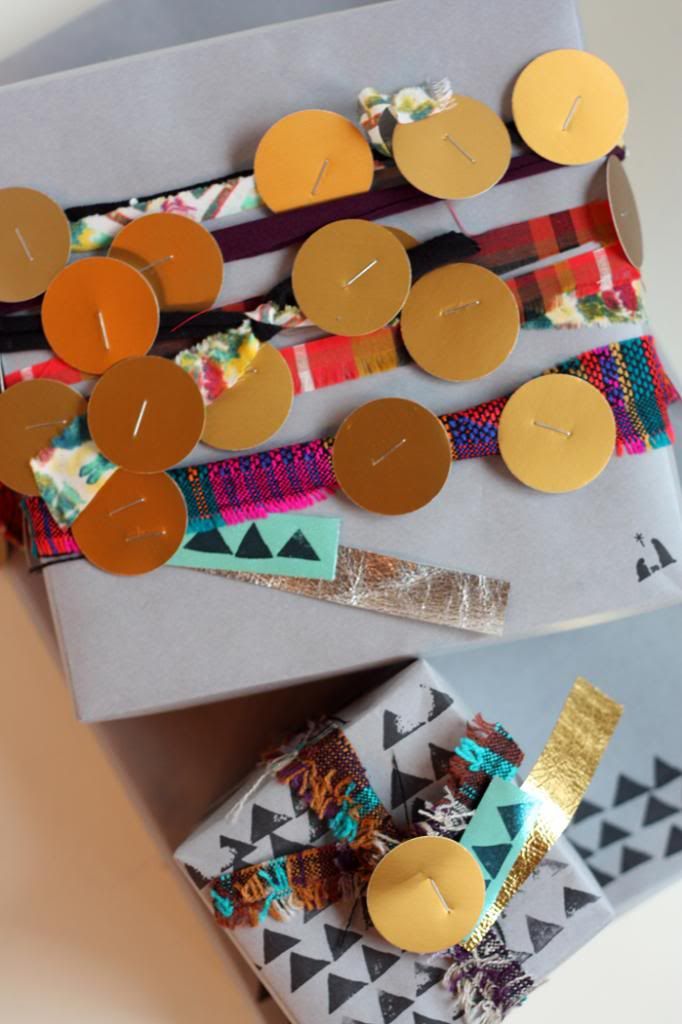
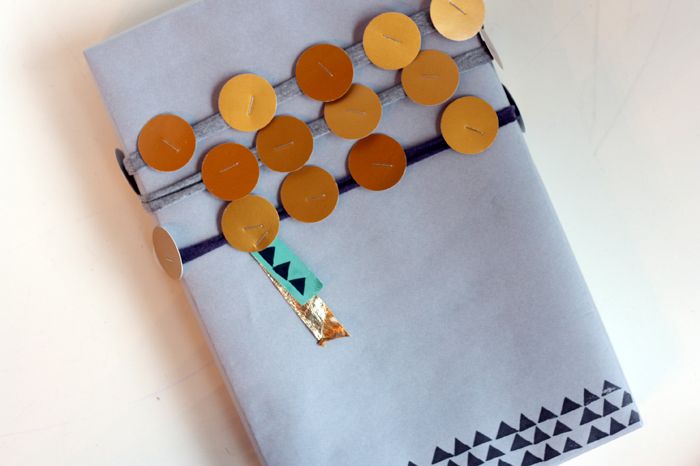
Now I know everyone but me is practically all decorated and ready for the holidays but I had to share this little project I did. I am completely in love with this little wrap job! (It might be though that I really just like wrapping gifts. Seriously my favorite part about Christmas I think.) 

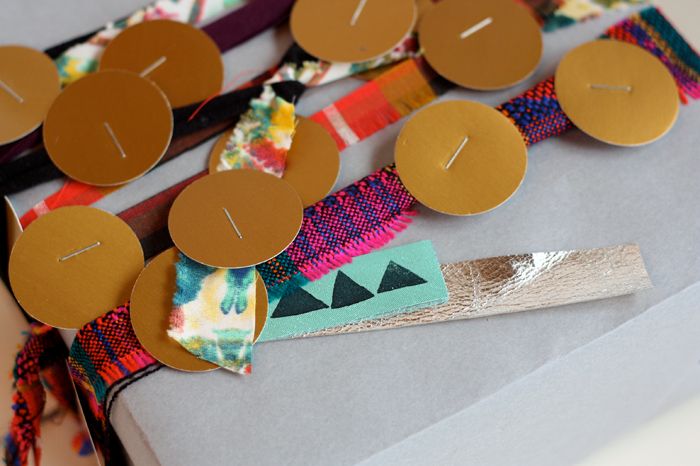
 I love the mix of fabrics and colors as well as the random placement of the circles here. It has the perfect mix of bohemian, upcycled, hipness to it in my opinion! I think really it just screams... "DAWNELLE"


So let's get on with it!

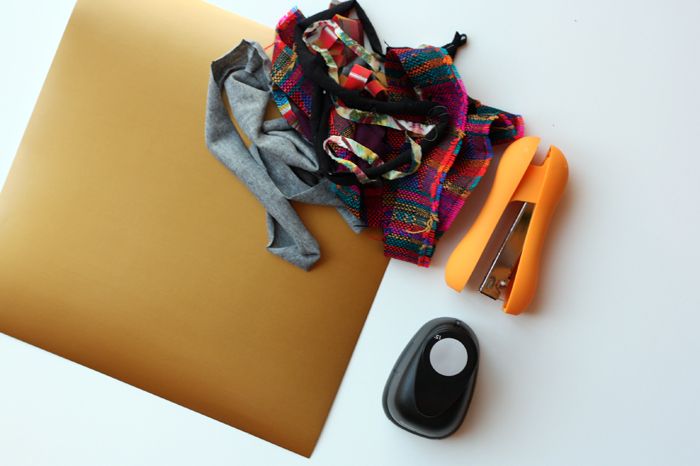
Supplies
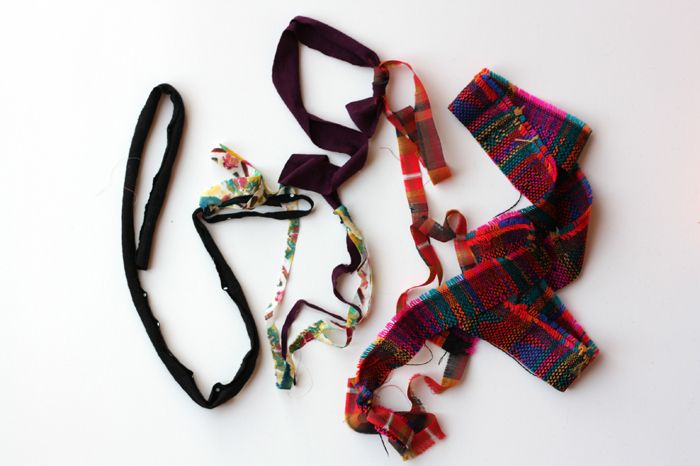
Strips of scrap fabric (you know the pieces that you cut off to square your fabric edges up work perfectly!)
Card stock
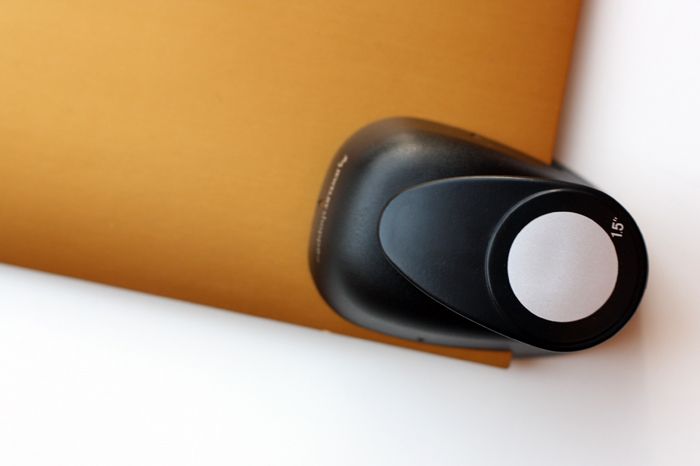
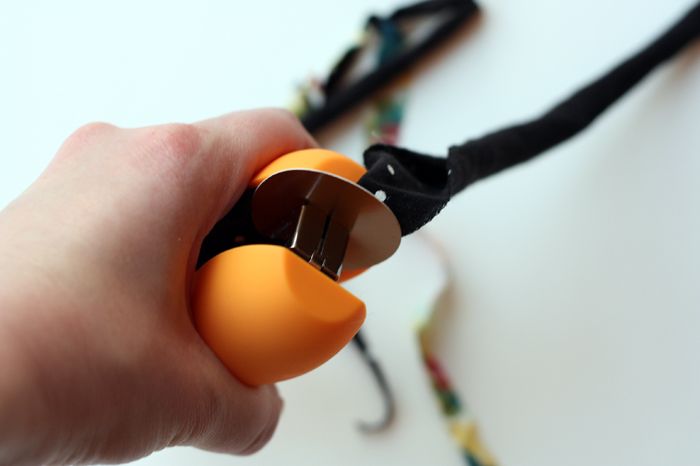
Circle punch (or something to cut out circles... I am just a little obsessed with this circle punch at the moment...)
Stapler


Instructions
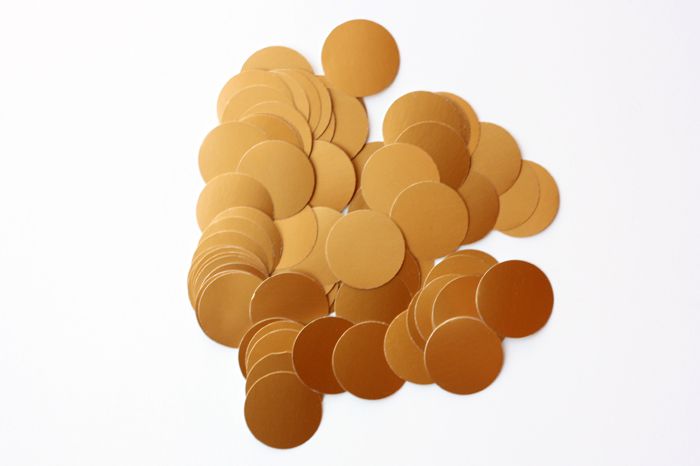
Begin by punching out all your circles. Super fun and oddly fulfilling... LOVE hole punches...


Once you have a great collection of little circles, marvel at the funness of them a while and then push them to the side. Promise we will get back to them!


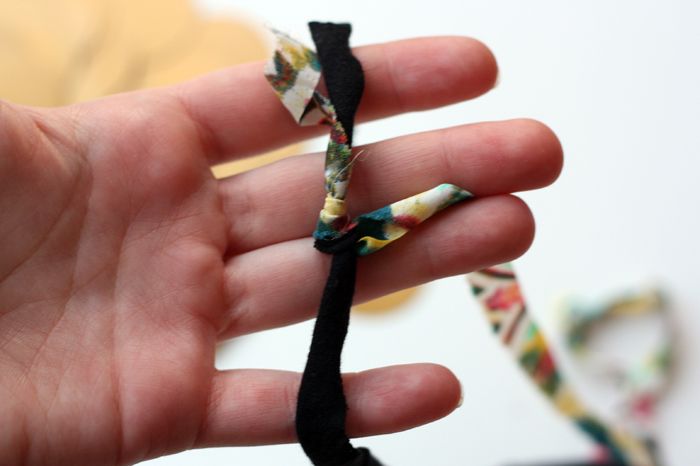
Begin tying your strips of fabric together to get the desired length you want. Have fun with the fabric too! It doesn't have to match perfectly... that is what makes it different and exciting. The circles are going to bring it all together and make it cohesive.


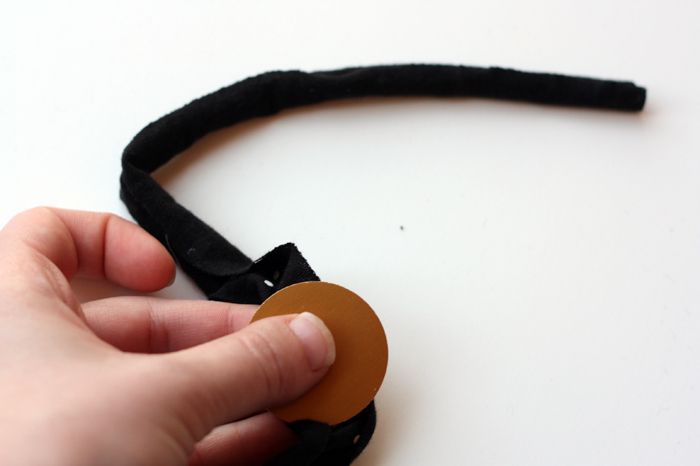
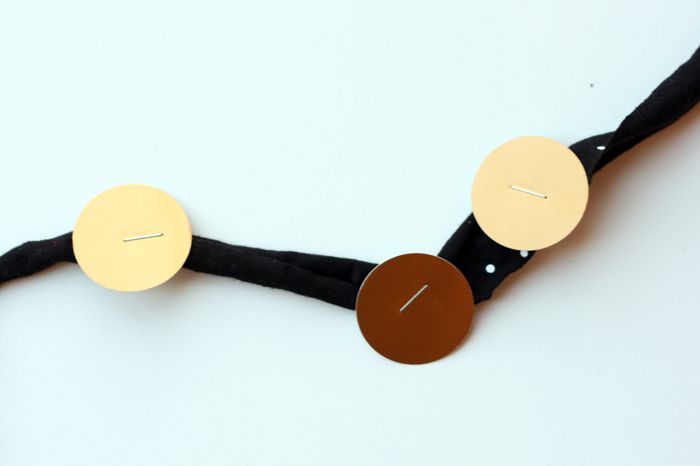
When your fabric strips are the desired length begin stapling your circles on. Don't worry about being perfect, that's the fun part!


Once you have your packing all ready... wrap away!! For the tags I used little scraps of leather stamped with a hand cut triangle stamp. I love the contrast between all the perfect circles and the straight lines of the triangles.

Now, have fun with it! Seriously... you can make all your packages like little mini works of art. Okay maybe I like wrapping a little too much...


So what do you think?? Super simple right? Do you love it as much as I do?